Hi!
Here I will show you how to make a gift box for baby girl. (Scroll down).
I warn you - this is a long post... ;)
All flowers and embellishments are from Wild Orchid Crafts.
This box measures 10 x 10 cm and is 4 cm tall.
Materiallist from Wild Orchid Crafts:
Wild Rose Pale Pink 30mm QVR-035
Trellis Roses Pink Tone 35mm MKX-092
Rosebuds Pink/Ivory 4mm GST-010
Hip Rosebuds Pale Pink GST-060
Pearl String White 4mm MKX-533
Self Adhesive Pearls White 5mm MKX-322
Tutorial:
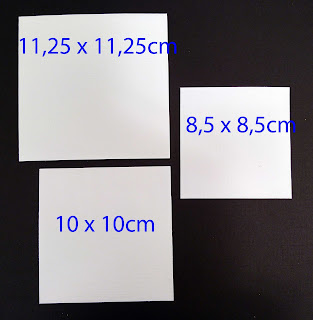
Start with a cardboard at 18 x 18cm.
Make a score 4 cm from the edges as shown below.
Fold and clue together (A on B).
Cut a cardboard at 14 x 10 cm, score at 4cm as shown below.
This will become the lid.
Cut patterned paper as shown below.

Glue the patterned paper around the box and glue the lid ( A on B) on as shown below.

Cut a cardboard as shown below.
Cut a patterned paper as shown below.
I add a thin layer of Gesso around the edges.
Glue patterned paper on the cardstock.
Glue on as shown below.
Cut a cardboard at 11 x 11cm. This will become the bottom.
Glue the box onto it as shown below.
Cut out three circles with a die.
I use a little bit of pink in on the white circles of cardboard.
I attach some 3D-dots on the biggest circle and glue the other two circles onto it.
Then I glue this on to the top.
I attach pearl bands at the bottom around the edges and on the top of the box as shown below.
Then I glue on a little baby figurine and start decorating the box with some flowers.
I always start with the biggest flower first.
Then I attach smaller and smaller flowers as shown.
The last thing I do is adding a thin layer of "Frost" (Snow Writer and Star Dust).
I also glue the pearl band around the baby figurine.
I have used dies from Sizzix (leaves).
At the end I attach a gratulation-greeting on the box and than attach som half pearls onto it.
Hope you like it!
Randi
Randi


Beautiful box!
ReplyDeleteI love your work!
Thank you for sharing!
Thank you! :)
DeleteSuch a beautiful box. A great inspiration for upcoming baptism.
ReplyDeleteThank you! :)
DeleteSo pretty thanks for the tutorial Love and hugs Carole
ReplyDeleteThank you! :)
DeleteСпасибо за подробный урок!
ReplyDeleteПросто приятно!
DeleteAlltid like flink med boksene dine du, Randi! 💖 Nydelig!
ReplyDeleteTusen takk! :)
DeleteСпасибо, это то, что надо!!!!
ReplyDeleteBeautiful box USA
ReplyDelete