Another day of fabulous Christmas ideas!
Have you been enjoying all the ideas and tutorials? I know you have.
To enter into the Wild Orchid Crafts GRAND PRIZE click HERE!!!!!
To enter the LOTV GRAND PRIZE click HERE!!!!
Here are a few more gorgeous projects from the Design Teams!!!
Shaker Ornament
by Design Team Member
Kylie
To make your shaker ornament you will need:
Patterned paper for the back
Patterned paper for the front
Heavy cardstock for reinforcing your paper
Acetate sheet
German Glass Glitter
Coloured image
Foam tape
Adhesive
Embellishments from Wild Orchid Crafts
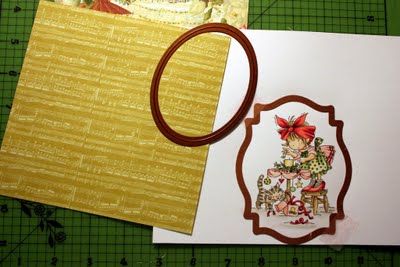
1. Colour your image and choose the dies you wish to use. You will need a nestie (or other die) large enough to fit another nestie inside with a boarder of 1/4 inch. I have used Large Classic Ovals and Labels 18. 2. To give your shaker ornament a bit more stability, adhere the patterened paper to some heavy cardstock. Do this with the rear of the ornament as well as the front.
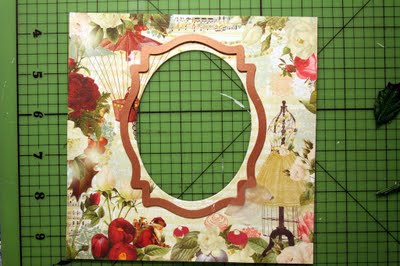
3. Cut your 'window' with your oval nestie and line up your label nestie over the cut piece so you have a border large enough to attach foam tape later on. I like to have 1/4 inch.
4. Use your shaped nestie to cut around your coloured image and adhere this to your backing piece.
5. Cut a piece of acetate with the shaped nestie as well
6. Adhere the acetate shape to the back of the front of the frame to create a window
7. Attach some foam tape around the frame, being careful that you have no gaps for the glitter to fall out but also so you can't see the foam tape from the front of the window section
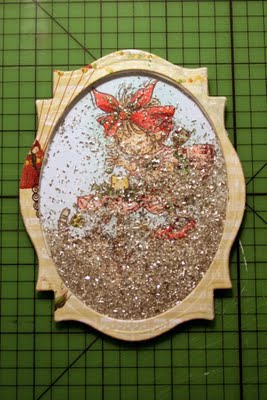
Now the fun part  8. Pour about 2 teaspoons of German Glass Glitter into the window. I have used 'silver'
 9. Then remove the tape backing and attach the coloured image to the window,carefully lining up the corners.
10. Your shaker ornament is now coming together...
11. If you like a vintage look, ink the edges with some distress stain.
And the finished Ornament
Christmas Card
by Design Team Member
Pops
Christmas Card
Be back tomorrow for the last day of our Christmas in July Party and more inspiration!
Thank you so much for visiting the Wild Orchid Crafts Blog!!!